How to Choose Your First Hiking Backpack: Volume, Fit, and What Actually Matters
Volume, frame type, fit, and features — cut through the jargon with a practical framework for choosing the right pack, whether you're planning a day hike or a weekend trip.
Key Takeaways
- Start Here — What Kind of Hiking Are You Doing?: Before you look at a single pack, answer this: what are you actually using it for? Pack volume — measured in liters — should be matched to trip length.
- Fit First — Torso Length, Not Overall Height: This is the most important thing most beginner buyers get wrong: hiking backpack sizing is based on your torso length, not your overall height.
- The Hip Belt — The Most Important Feature: A padded, properly fitted hip belt is the single most important feature on any pack you'll carry for more than a short walk.
- Frame Types and Back Panel Design: Internal frame packs — where aluminum stays or a plastic framesheet are inside the back panel — are the standard for hiking and backpacking.
Volume, frame type, fit, and features — the outdoor gear industry makes choosing a hiking backpack sound more complicated than it needs to be. Walk into any outdoor store and you'll find packs ranging from $60 to $600, with specs that read like engineering documents.
Here's the truth: your first hiking backpack doesn't need to be expensive, technically impressive, or loaded with features. It needs to fit your body correctly and match the type of hiking you're actually going to do. Get those two things right and everything else is secondary.
This guide cuts through the jargon and gives you a clear, practical framework for choosing the right pack — whether you're planning your first day hike or preparing for a weekend camping trip.
Start Here — What Kind of Hiking Are You Doing?
Before you look at a single pack, answer this: what are you actually using it for? Pack volume — measured in liters — should be matched to trip length. Buying too large a pack is one of the most common beginner mistakes. A pack that's too big encourages overpacking, adds unnecessary weight even when empty, and creates a less stable carry on technical terrain.
For day hikes, a 15-30 liter daypack is the right range. This size comfortably carries the day hiking essentials: water, food, a rain jacket, a first aid kit, extra layers, and navigation tools. Review the ultimate day hike packing list to see exactly what you'll be carrying — 20-25 liters covers everything comfortably for most people.
For one to three night trips carrying a sleeping bag, shelter, cooking kit, food, and clothing, a 40-55 liter pack is the sweet spot for most beginners. For trips of four or more nights, or any outing where you need to carry bulkier cold-weather gear, a 55-70 liter pack is appropriate. Packs above 70 liters are expedition-grade tools — most beginners have no reason to start here.
- Day hiking (no overnight gear): 15-30L
- Overnight and weekend trips (1-3 nights): 40-55L
- Multi-day backpacking (4+ nights): 55-70L
- Expedition/mountaineering: 70L+ (not needed for most beginners)
Fit First — Torso Length, Not Overall Height
This is the most important thing most beginner buyers get wrong: hiking backpack sizing is based on your torso length, not your overall height. Two people who are both 5'10'' can have very different torso measurements — and therefore need different pack sizes.
To measure your torso: tilt your head forward and find the bony bump where your neck meets your shoulders (C7 vertebra). Place your hands on your hips with thumbs pointing backward — your thumbs mark the top of your iliac crest. Measure along your spine between these two points. That's your torso length. Match it to the manufacturer's size range for any pack you're considering.
Women's packs are genuinely different from men's packs in meaningful ways, not just scaled down. They typically feature shorter torso lengths, narrower shoulder strap spacing, and hip belts contoured to sit on a wider pelvic structure. For most women, a women's-specific pack will fit and carry significantly better than a unisex or men's pack in the same volume.
The Hip Belt — The Most Important Feature
A padded, properly fitted hip belt is the single most important feature on any pack you'll carry for more than a short walk. Everything else is secondary.
Your shoulder muscles are not designed to carry heavy loads over long distances. Your hips and legs are. When a backpack is correctly fitted, approximately 80% of the pack's weight transfers to the hip belt and rides on your iliac crest — your two hip bones — and from there into your legs. This is why a properly fitted $150 pack with a good hip belt feels dramatically better on mile 8 than an improperly fitted $400 pack where the hip belt is doing nothing.
Always follow this adjustment order with a loaded pack: (1) position the hip belt directly on top of your hip bones and tighten firmly, (2) pull shoulder straps snug against shoulders, (3) gently tighten load lifters at about 45 degrees — don't over-tighten, (4) clip and lightly adjust the sternum strap last. Most beginner back pain from pack carrying comes from skipping step 1 or placing the hip belt on the waist instead of the hip bones.
Frame Types and Back Panel Design
Internal frame packs — where aluminum stays or a plastic framesheet are inside the back panel — are the standard for hiking and backpacking. The internal frame keeps the pack close to your body, improving stability on uneven terrain and allowing a more natural range of motion. External frame packs are still appropriate for very heavy, irregular loads but are uncommon for modern hiking use.
Frameless packs — popular with ultralight hikers — have no rigid structure and rely on the load itself for structure. These are expert tools that require careful packing discipline and are not appropriate for beginners still learning how to assemble and balance a load.
Some packs have a tensioned mesh back panel that holds the pack slightly away from your back, creating an air gap for ventilation. These reduce sweat significantly in warm weather but move the center of gravity slightly away from your body. Contact back panels carry weight slightly more efficiently but run warmer. Choose based on your climate and preferred hiking season.
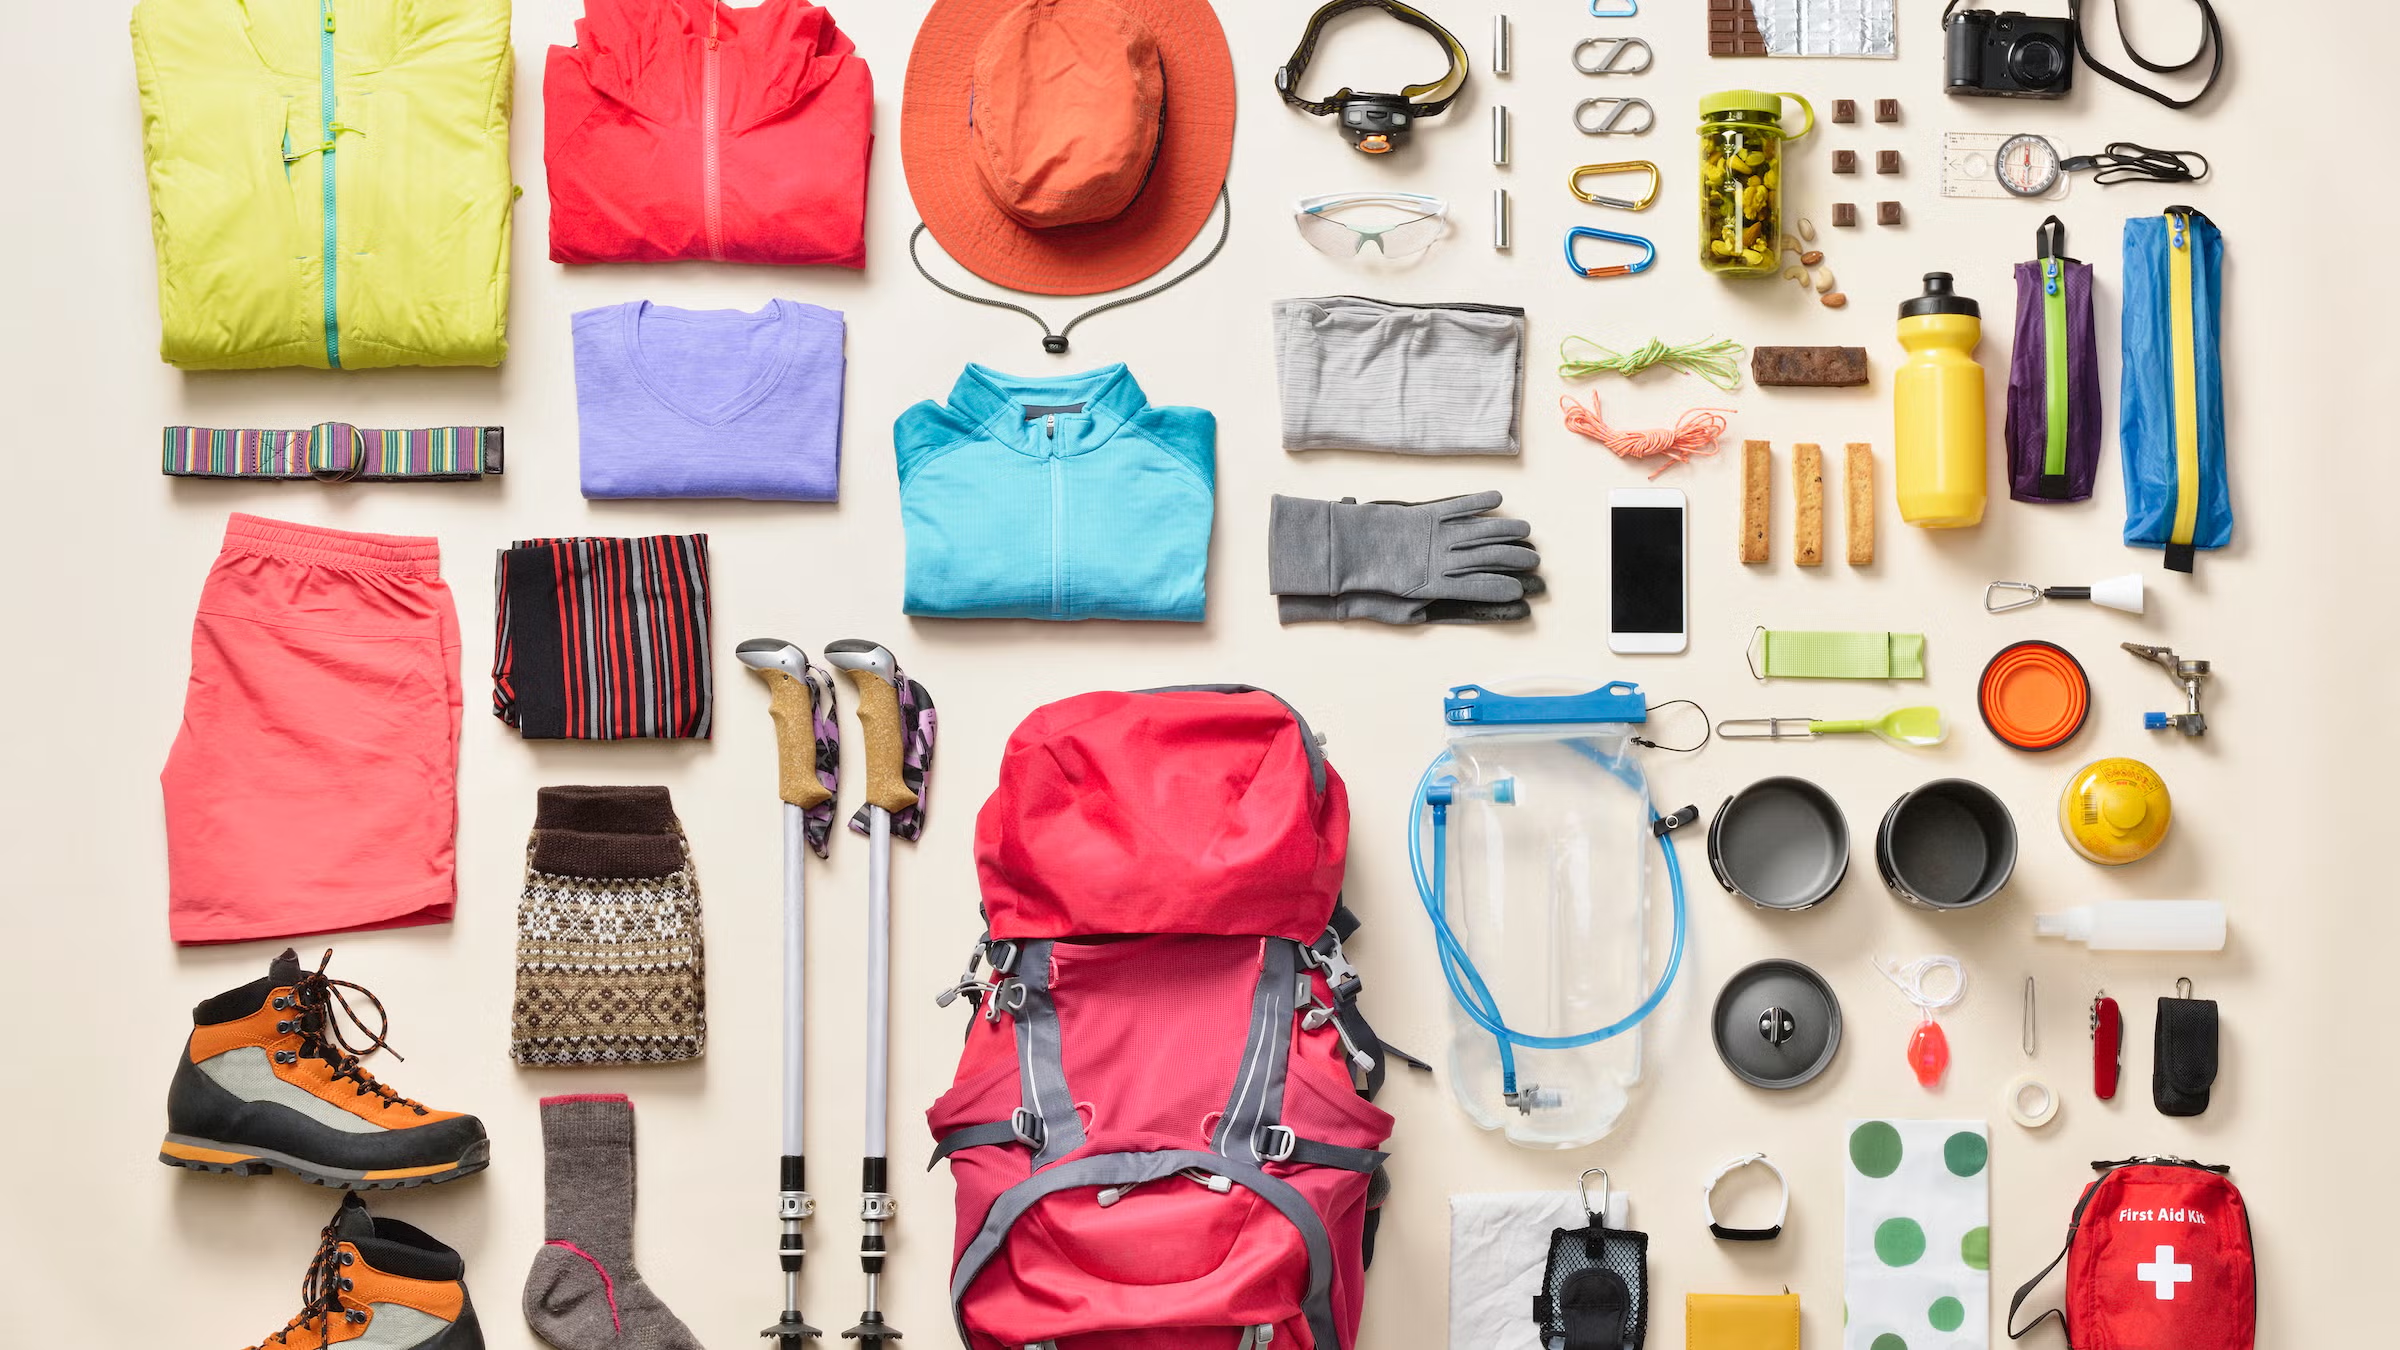
Features Worth Having (and What to Ignore)
Hip belt pockets — small zippered pockets on the hip belt wings — keep your phone, snacks, and lip balm accessible without taking the pack off. Genuinely useful on any hike longer than a couple of hours. A hydration sleeve is convenient if you prefer hands-free hydration to stopping for a water bottle. A rain cover — either built-in or aftermarket — is worth having if you hike in any climate where rain is possible. Pack fabric is water-resistant, not waterproof; sustained rain will eventually soak through.
Features beginners don't need: removable top lids that convert to summit packs, crampon attachment patches, ice axe loops, ski carry systems. Don't pay for features you won't use for years, if ever. The same applies to ultralight materials — a 2.5-pound pack made from Dyneema requires careful handling and isn't built for the abuse a beginner will give it. Choose a slightly heavier pack (3-4 pounds) with robust materials that will survive being dropped, overfilled, scraped on rock, and thrown in car trunks.
How to Pack It Properly
How you load your pack affects how it carries almost as much as the pack itself. Pack your heaviest items — water reservoir, food, cooking kit, heavy clothing — closest to your back panel in the middle section of the pack. This keeps the weight close to your center of gravity, reducing the rearward pull that strains your lower back and throws off your balance.
Lighter, bulkier items (sleeping bag, extra layers) go at the bottom. Items you need to access frequently go at the top or in hip belt pockets. Your rain jacket, snacks, first aid kit, and navigation gear should be reachable without unpacking the entire bag.
When you're ready to start thinking about reducing what you carry, the guide on ultralight backpacking tips shows how experienced hikers trim pack weight — which often leads to choosing a smaller pack volume on the next purchase.
The Bottom Line
Choosing your first hiking backpack comes down to two decisions: pick the right volume for your trip type, and get a pack that fits your torso. Everything else — features, brand, price — is secondary to those two things.
Measure your torso before you shop. Match volume to your actual trip plans. Try the pack on with weight in it and verify the hip belt sits on your hip bones, not your waist. If those three things are right, you've made a good choice.
Explore Trailwise Gear's hiking backpack collection for trail-tested recommendations at every price point — and pair it with the right hiking boots to complete your kit.
Products We Recommend

Written by
Sarah Chen
Gear Analyst & Writer · Trailwise Gear
Sports science graduate with a background in biomechanics. Brings data-driven analysis to gear testing — quantifying comfort, weight distribution, and material performance.
Ultramarathon Runner · Alpine Mountaineer
Meet the full team →
Find the Best Gear
Browse our expert-ranked gear categories.