How to Read a Trail Map: A Beginner's Guide to Topo Maps and Navigation
Trail apps are great until your battery dies at mile 8. Learning to read a topo map and use a compass is the skill that separates prepared hikers from search-and-rescue statistics.
Key Takeaways
- Trail Maps vs. Topo Maps — Know the Difference: Not all maps are created equal, and using the wrong one is a common beginner mistake.
- Contour Lines — The Language of Topo Maps: Every contour line on a topo map connects points that share the same elevation above sea level.
- Map Colors, Symbols, and Scale: The color coding on topo maps follows a consistent system worth memorizing.
- How to Orient Your Map With a Compass: Your compass needle points to magnetic north — not geographic true north.
Phone GPS is a fantastic tool until the battery dies at mile 8, two miles from the nearest road with a storm rolling in. Your phone can tell you where you are. A paper map tells you where you are in the landscape — and that's a different, more powerful kind of knowledge.
Learning to read a trail map is one of those skills that feels unnecessary until the one moment it isn't. Search and rescue teams are called out regularly for hikers who followed a GPS signal into trouble, or whose phone died in the cold before they could find the trail back. A paper topo map weighs almost nothing, works in any weather, and never runs out of battery.
This guide covers everything a beginner needs to go from confused by squiggly lines to confidently navigating with a map in hand. You don't need to be an orienteering expert. You just need to understand the basics — and then practice them on every hike until they're second nature.
Trail Maps vs. Topo Maps — Know the Difference
Not all maps are created equal, and using the wrong one is a common beginner mistake.
Simple trail maps — the kind you find on park websites, trailhead kiosks, or printed brochures — show you trails, roads, parking areas, and water sources. They're great for trip planning and getting a sense of the trail network. What they don't show is elevation. A simple trail map can't tell you whether you're walking into a gentle slope or a brutal 1,200-foot climb in a mile.
Topographic maps — topo maps — do everything a simple trail map does, plus they show the three-dimensional shape of the land on a two-dimensional piece of paper. They reveal hills, valleys, ridges, cliffs, and drainage patterns through a system of contour lines. With a topo map, you can look at a piece of paper and visualize what the terrain will actually feel like underfoot.
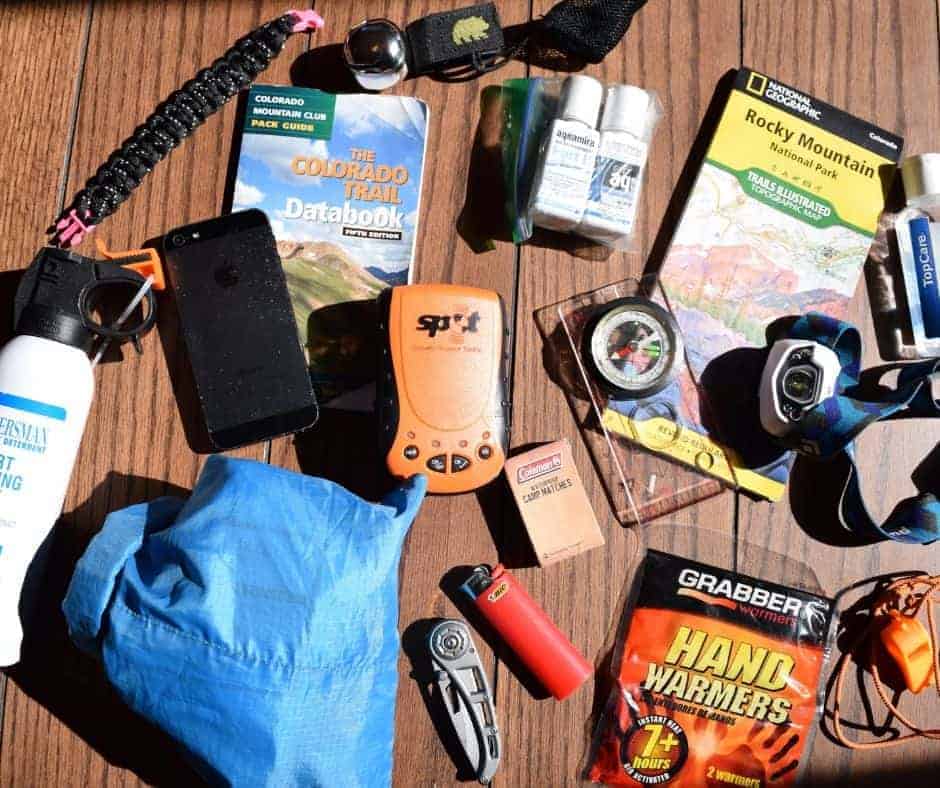
Navigation is one of the Ten Essentials that every prepared hiker should carry, as covered in the ultimate day hike packing list. For popular local trails you know well, a downloaded offline map on your phone may be sufficient. But any time you're venturing into less familiar territory, carrying a paper topo map is the smart play.
Contour Lines — The Language of Topo Maps
Every contour line on a topo map connects points that share the same elevation above sea level. If you were to physically walk along a single contour line on the ground, you'd stay at a constant elevation the whole way.
Contour lines are drawn at regular vertical intervals called the contour interval — typically every 40 feet on standard USGS maps. Every fifth contour line is thicker and darker — these are index contours, labeled with an elevation number.
The spacing between contour lines tells you the steepness of terrain. When lines are close together, elevation changes rapidly — the terrain is steep. When they're far apart, the terrain is gentle. When lines are nearly stacked on top of each other, you're looking at a cliff.
Contour lines also form recognizable patterns: peaks appear as concentric circles with each ring at higher elevation toward the center. Valleys and drainages appear as V-shapes pointing uphill. Ridgelines appear as elongated patterns pointing downhill away from high ground. Saddles — low points between two peaks — appear as an hourglass shape.
Map Colors, Symbols, and Scale
The color coding on topo maps follows a consistent system worth memorizing. Brown contour lines show elevation and terrain. Blue features represent water — rivers, streams, lakes, seasonal drainages. Green shading indicates vegetation, typically forested areas. Black symbols represent human-made features: trails (usually dashed lines), roads, buildings.
Map scale tells you the relationship between map distance and ground distance. A scale of 1:24,000 means one inch on the map represents about 0.38 miles on the ground — the most common scale for USGS hiking maps. A scale of 1:63,360 (one inch = one mile) covers more area with less detail.
To measure trail distance: use a piece of string along a winding trail, then measure the string against the bar scale. One important note: topo map distances are horizontal only. A trail with significant elevation gain will take considerably longer than a flat trail of the same map distance.
- Brown — contour lines, elevation and terrain
- Blue — water features: rivers, streams, lakes
- Green — vegetation, forested areas
- Black — human features: trails, roads, buildings
- White/light — open terrain, meadows, alpine zones
How to Orient Your Map With a Compass
Your compass needle points to magnetic north — not geographic true north. The difference at any given location is called magnetic declination, which varies across the US from nearly 20 degrees east on the West Coast to nearly 20 degrees west on the East Coast. Always check the declination diagram printed on your topo map.
To orient your map with a baseplate compass: place the compass flat on the map with the direction-of-travel arrow pointing toward the top (north) of the map. Rotate the compass bezel until the orienting lines align with the map's north-south grid lines. Account for your local declination by adjusting the appropriate degrees east or west. Then rotate your entire body — holding the map and compass together — until the compass needle aligns with the orienting arrow. Your map is now oriented to match the terrain around you.
On clearly marked trails with good signage, you can navigate effectively with just a map by matching terrain features to what you see on paper. In fog, dense forest, featureless terrain, or anywhere off-trail, a compass is essential.
Using Your Map on the Trail
The most important navigation skill isn't rescue navigation — it's ongoing awareness. Before you leave the trailhead, orient your map and identify two or three major landmarks you'll pass: a ridgeline, a stream crossing, a peak visible from the trail. Check off those landmarks as you hike.
Pull out your map at trail junctions. Confirm which direction you're heading before you move. A useful question to ask constantly: does what I'm seeing match what the map shows? If the terrain doesn't match your map, stop. Check your orientation. Look for a landmark that helps you reestablish your position before continuing.
Apps like Gaia GPS and AllTrails allow you to download maps for offline use — your phone's GPS locates you using satellites, not cell towers, so it functions in the backcountry regardless of signal. But phones die in the cold and crack when dropped. Carry both, know how to use both, and treat your phone map as a convenience rather than a lifeline.
Knowing your route is also part of staying safe in remote wilderness. The guide on bear safety on the trail covers how route awareness factors into wildlife encounters and emergency preparedness.
The Bottom Line
A topo map is more than a navigation backup. It's a window into the landscape that tells you things no app can — the true shape of the terrain, the steepness of the climb ahead, where water flows, and where ridgelines cross. Once you can read one, every hike becomes richer.
Start with a familiar trail. Download a topo map of an area you know, take it out on your next hike, and spend the whole time cross-referencing what you see on paper with what you see on the ground. Match the contour lines to the hills. Find the creek crossings. Identify the saddles. After a few hikes of deliberate practice, you'll be reading terrain as naturally as reading a page.
Ready to build out your navigation kit? Explore Trailwise Gear's full range of hiking essentials — including the right pack to carry them in, plus our outdoor accessories and safety gear for a complete trail kit.
Products We Recommend

Written by
Marcus Osei
Founder & Lead Reviewer · Trailwise Gear
Former wilderness guide with 15 years of expedition experience across Patagonia, the Rockies, and the Himalayas. Has personally tested over 400 pieces of gear in the field.
PCT Section Hiker · Appalachian Trail Thru-Hiker
Meet the full team →

Find the Best Gear
Browse our expert-ranked gear categories.